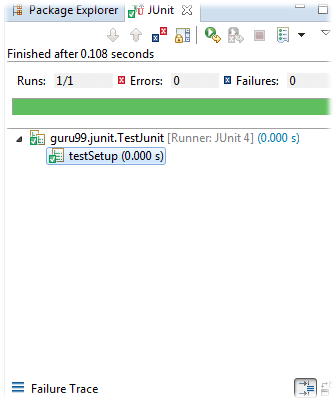
安装Junit是一个由6部分组成的过程。现详细解释如下:
第1部分) 安装Java
JUnit是用于测试基于Java的应用程序的测试框架。因此,在安装JUnit之前,需要在机器中配置或验证Java开发工具包(JDK)。
单击本教程下载并安装Java
第2部分)下载JUnit
步骤1)访问https://junit.org/junit4/并单击下载并安装
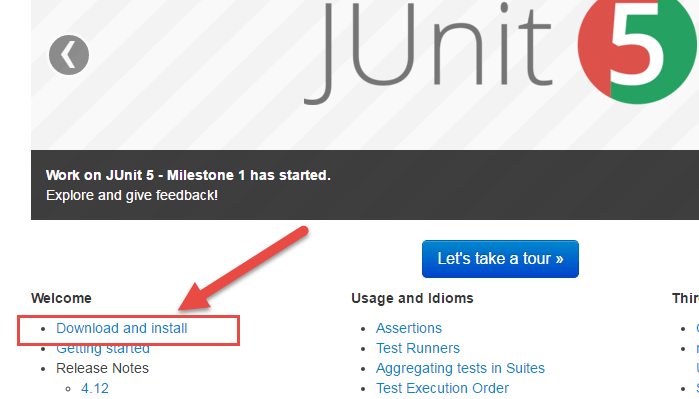
步骤2) 点击juit.jar
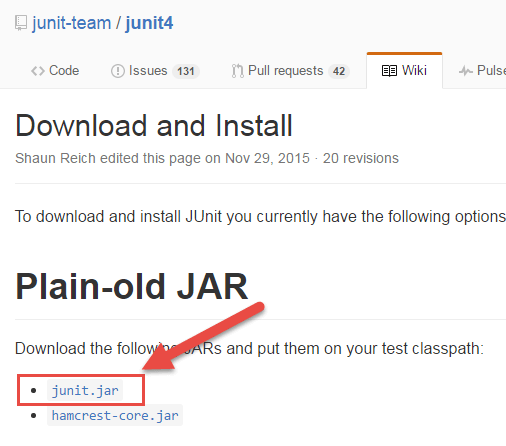
步骤3) 在中央存储库中,将看到可以下载的所有版本的Junit。单击JAR链接下载Junit版本4.12,如下所示
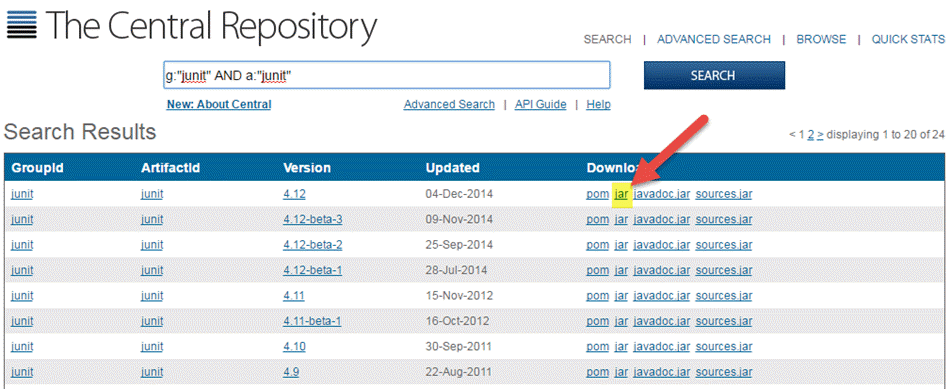
步骤4) 再次访问https://github.com/junit-team/junit4/wiki/Download-and-Install。单击hamcrest-core.jar
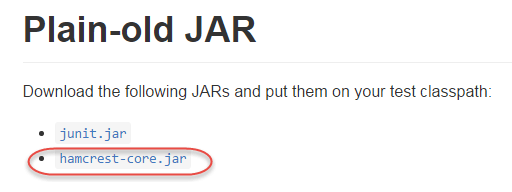
步骤5) 下载Jar

对于JUnit安装,需要JUnitJAR,可以从JUnit官方网站http://www.junit.org下载所需版本的JUnit jar文件
这是罐子清单:
- JUnit.jar
- hamcrest-core.jar
第3部分) JUnit环境设置
步骤1) 需要设置JUNIT_HOME环境变量,以指出放置JUnit JAR的基本位置。
例如,如果在c:drive中创建了一个JUnit文件夹并在其中放置了JAR,那么对于环境设置,需要打开控制面板->高级->环境变量。
- 在环境窗口下单击“新建”按钮。
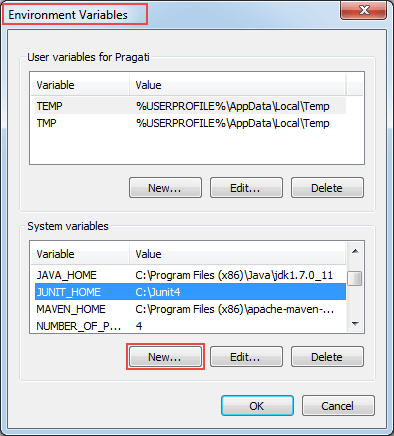
当单击环境变量中的新建按钮时,它将打开另一个窗口
步骤2) 将打开“新建系统变量”窗口:
- 提供变量名“JUNIT_HOME”。
- 将JUnit值作为复制JUnit JAR文件的JUnit路径提供。
- 单击OK(确定)。
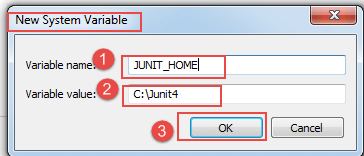
单击“确定”后,将创建一个具有给定名称和值的新系统变量。可以在环境变量窗口中进行验证,如步骤1图像所示。
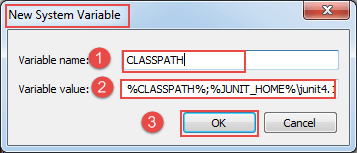
步骤3) 创建JUNIT_HOME后,创建另一个名为CLASSPATH的变量。再次转到“环境变量”,然后执行以下步骤。
- 点击“新建”按钮。当单击环境变量中的新建时,它将打开另一个窗口。
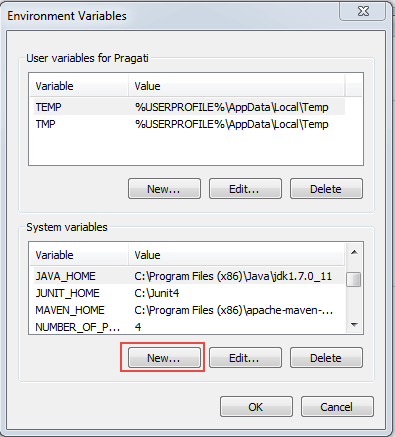
步骤4) 在本步骤中,将JUNIT_HOME指向JUnit.jar,JUnit.jar放在JUnit文件夹中,如下所示:
- 变量名:CLASSPATH
- 变量值:%CLASSPATH%;%JUNIT_HOME%4.10.jar;。;
- 单击OK按钮。
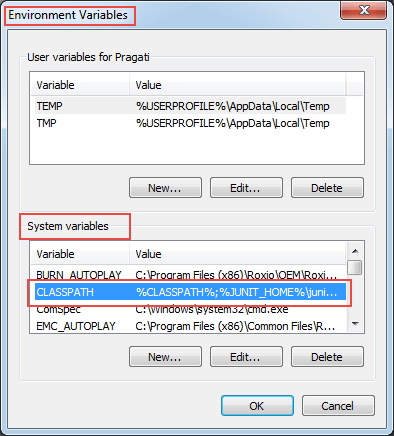
步骤5) 单击“确定”按钮后,可以验证在系统变量下是否可以看到名为“CLASSPATH”的新环境变量。见下文
第4部分) 在Eclipse中安装JUnit JAR文件
步骤1)右击项目:
- 单击“Build Path”(构建路径),然后
- 单击“Configure Build Path…”。

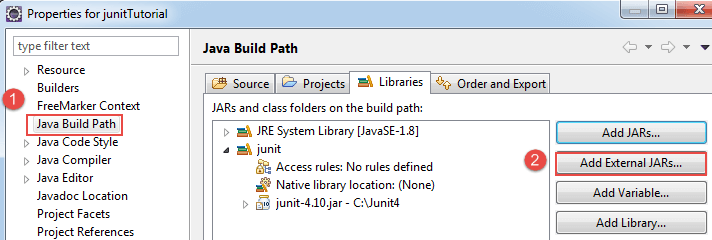
步骤2) 在本步骤中,
- 转到java构建路径窗口,如下图所示
- 现在单击“Add External Jars”按钮,使用Eclipse添加下载的JUnit.jar文件。
添加JUnit.jar文件后,单击“确定”按钮关闭java构建路径窗口。
第5部分) 验证JUnit所需的JAR文件是否在我的构建路径中
为了在Eclipse中验证JUnit JAR文件,需要执行以下步骤:
- 右键单击项目->“Build Path”
- 单击“Configure Build Path”。

步骤2) 出现如下所示的Java构建路径窗口。
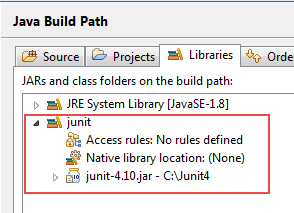
在该窗口中,转到Libraries选项卡以查看所有JAR文件。在JAR文件树视图中,需要查找以JUnit开头的JAR文件名。
展开JUnit库后,可以看到如下所示的java库:
现在已经准备好在Eclipse中使用JUnit了。
第6部分) 验证JUnit设置
可以创建一个简单的JUnit测试来验证JUnit设置。参见下面的测试类:
步骤1) 创建一个名为TestJUnit.java的java类,并提供一个简单的assert语句。
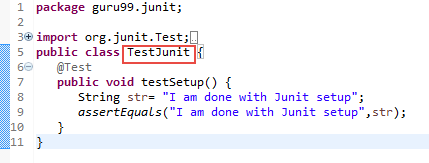
package guru.junit;
import org.junit.Test;
import static org.junit.Assert.assertEquals;
public class TestJunit {
    @Test
    public void testSetup() {
        String str= "I am done with Junit setup";
        assertEquals("I am done with Junit setup",str);
    }
}
步骤2) 创建一个Test Runner类来执行上述测试。
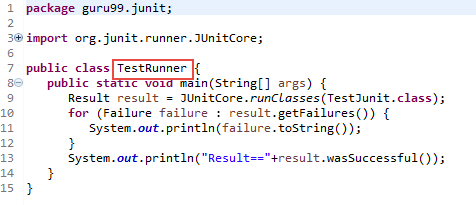
package guru.junit;
import org.junit.runner.JUnitCore;
import org.junit.runner.Result;
import org.junit.runner.notification.Failure;
public class TestRunner {
    public static void main(String[] args) {
        Result result = JUnitCore.runClasses(TestJunit.class);
        for (Failure failure : result.getFailures()) {
            System.out.println(failure.toString());
        }
        System.out.println("Result=="+result.wasSuccessful());
    }
}
步骤3) 要执行测试,执行以下步骤:
- 右键单击TestJunit.java,然后单击“Run As”,如下所示
- 点击“Run As”(运行方式),点击“1 JUnit Test”(1 JUnit测试),将会打开另一个窗口,如下图所示:
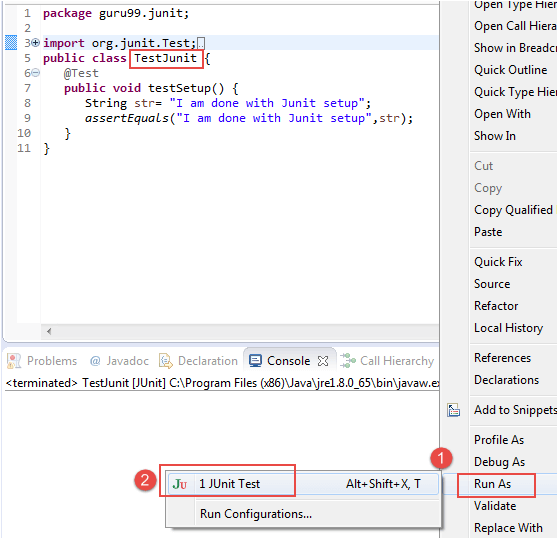
步骤4) 这是测试的输出或结果。如果成功执行,它前面将显示一个绿色复选标记。
